How to use the Label htmlFor Property in JavaScript
The Label htmlFor property enables us to modify labels’ for property via JavaScript. We use the HTML <label> element to caption form elements, such as a text box, checkbox, radio button, etc.
🎧 Debugging Jam
Calling all coders in need of a rhythm boost! Tune in to our 24/7 Lofi Coding Radio on YouTube, and let's code to the beat – subscribe for the ultimate coding groove!" Let the bug-hunting begin! 🎵💻🚀

To do so, all you need to do is to set the label’s for attribute with the ID string of its corresponding form element – this means your form element (e.g, a radio button) should already have an ID attribute.
Something like this:
<form action=some-url>
    <label for=usernameId>Username: <label>
    <input type=text name=username id=usernameId>
    <br>
    <input type=submit value=Submit>
</form>
Labelling form elements have multiple accessibility advantages:
📢 Assistive technologies: It makes the label and the form element programmatically related. For instance, a screen reader would read out the form element's label to visually-impaired users.
📲 Accessibility and UX: It also increases the hit area when interacting with a form element (click or touch); For instance, when you click the label of a text box, it'll gain focus, so you can start typing. Or if it's a checkbox (or a radio button), it'll be checked - a pleasant experience on small-screen devices.
Here's an example
<section>
    <label for=usernameControl>Username: </label>
    <input type=text id=usernameControl name=username>
</section>

<section>
    <input type=checkbox id=checkControl>
    <label for=checkControl>Click me</label>
</section>


<section>
    <input type=radio id=radioControl1 name=radioControl>
    <label for=radioControl1>Option 1</label>

    <input type=radio id=radioControl2 name=radioControl>
    <label for=radioControl2>Option 2</label>

    <input type=radio id=radioControl3 name=radioControl>
    <label for=radioControl3>Option 3</label>
</section>
But sometimes you might need to manage (set or get) a label's for property dynamically, from your JavaScript code.
In this quick guide, I'll explain how you can programmatically manage the for attribute with the help of the htmlFor property via JavaScript.

Psssst! Do you want to learn web development in 2023?
How to use the htmlFor property
The HTMLLabelElement.htmlFor lets you read the for attribute's current value. It also allows you to set its value on the fly.
Let's start with a quick example for those friends who need a short snippet for today. Then, we'll get to the details.
Let's imagine we have the following form control:
<form action=some-url>
    <label for=usernameId>Username: <label>
    <input type=text name=username id=usernameId>
    <br>
    <input type=submit value=Submit>
</form>
To read the value of the for attribute, you can access its htmlFor property in the DOM like so:
// Get the DOM element by Id
let label = document.querySelector('#usernameLabel')

// Access the htmlFor property
let forValue = label.htmlFor
And if you need to set the for value programmatically at runtime:
// Get the DOM element by Id
let labelElement = document.querySelector('#usernameLabel')

// Set the for attribute value via htmlFor property
labelElement.htmlFor = 'someValue'
In the above example, someValue is the ID of the element to which the label is associated.
Please note when a label is implicitly associated with a form control - by placing the form element within the label tag - this property would return an empty value:
<label>
    Username:
    <input type="text">
</label>
Can't we just use setAttribute/getAttribute?
Since the htmlFor property reflects the value of the for attribute, technically, it's possible to use setAttribute to set the for attribute of a label.
let labelElement = document.querySelector('#usernameLabel')

let forValue = labelElement.setAttribute('for', 'someValue')
However, Mozilla recommends using htmlFor whenever you need to set the for attribute programmatically.
Browser support
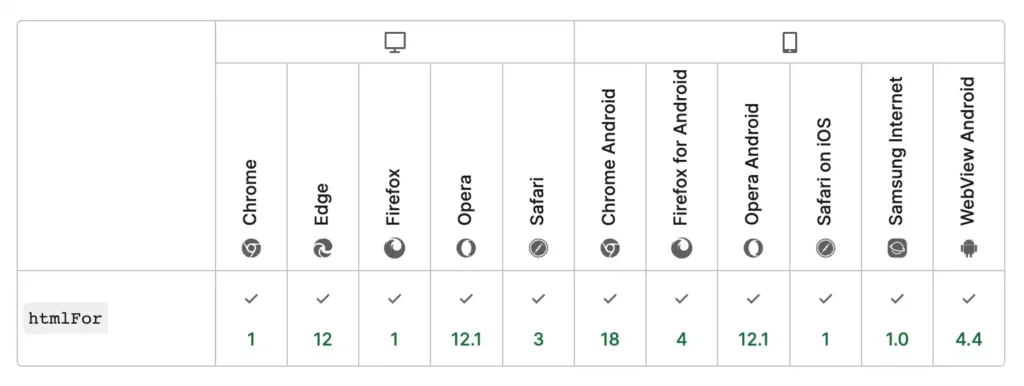
The htmlFor property is well-supported across most web browsers:
Wrapping up
The for attribute helps you add interactive behavior to a web page without writing a single line of JavaScript. For instance, to create custom checkbox/radio button elements or even trigger a popup or a sliding menu. However, if you need more control over your labels from javaScript code, label's htmlFor is the property you need.
Thanks for reading.

Reza Lavarian Hey 👋 I'm a software engineer, an author, and an open-source contributor. I enjoy helping people (including myself) decode the complex side of technology. I share my findings on Twitter: @rezalavarian
Never miss a guide like this!
Disclaimer: This post may contain affiliate links. I might receive a commission if a purchase is made. However, it doesn’t change the cost you’ll pay.